Hey there, Edgewater homeowners! Are you tired of the constant drip, drip, drip of your showerhead? Well, you’re in luck because we’ve got a comprehensive guide just for you, brought to you by A.C.E. Plumbing and Home Services LLC. In this article, we’ll walk you through the steps to repair your dripping shower head like a pro. Say goodbye to water wastage and those annoying high water bills. Whether you’re a seasoned DIY enthusiast or a first-time fixer-upper, we’ve got you covered. Let’s dive in and make your shower experience leak-free and enjoyable again!
Understanding the Problem:
Understanding the problem of a dripping shower head involves identifying common issues like a worn-out washer, loose connections, or mineral buildup. For more complex problems, professional plumbing services can be beneficial. Plumbers can diagnose and repair issues efficiently, ensuring a long-lasting solution. By addressing underlying plumbing issues, you can prevent recurring leaks and maintain the optimal performance of your showerhead and plumbing system.
Worn-Out Washer:
Inside your showerhead, there’s a rubber washer that can wear out over time, leading to leaks.
Loose Connections:
Sometimes, the connection between the showerhead and the pipe can become loose, causing water to leak out.
Mineral Buildup:
If you have hard water, mineral deposits can accumulate in the showerhead, clogging it and causing leaks.
Faulty Diverter Valve:
For those with a shower/tub combination, a faulty diverter valve can cause water to leak from the showerhead even when the tub faucet is turned off.
Now that we’ve identified the potential causes, let’s move on to the repair process.
Step-by-Step Repair Guide:
To repair a dripping shower head, turn off the water supply, remove the showerhead, inspect and replace the washer, reattach using pipe tape, and test for leaks. For advanced issues, consider checking the showerhead and pipe for damage or mineral buildup, and upgrade if needed. Additionally, consider professional drain services to prevent clogs and maintain optimal plumbing performance.
Step 1: Gather Your Tools
Before you start, make sure you have the necessary tools and materials on hand:
- Adjustable wrench
- Pipe tape (Teflon tape)
- Screwdriver (if needed)
- Replacement parts (if required)
- Bucket or towel (to catch water)
Step 2: Turn Off the Water Supply
Locate the shut-off valve near your shower or turn off the main water supply to your home. This step prevents water from flowing while you work on the showerhead.
Step 3: Remove the Showerhead
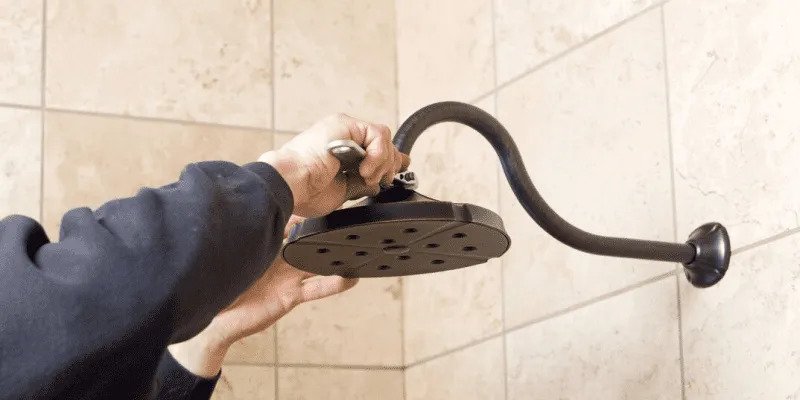
Use the adjustable wrench to carefully unscrew the shower head from the pipe. Place a towel or bucket underneath to catch any remaining water.
Step 4: Inspect and Replace the Washer

Check the rubber washer inside the showerhead. If it’s worn out or damaged, replace it with a new one of the correct size. Applying a few wraps of pipe tape to the threads can create a watertight seal when you screw the showerhead back on.
Step 5: Reattach the Showerhead
Carefully screw the showerhead back onto the pipe using the adjustable wrench. Ensure it’s snug but not overly tightened to avoid damage.
Step 6: Test for Leaks
Turn the water supply back on and test the showerhead to see if the drip has stopped. If the problem persists, you may need to check for other issues like loose connections or mineral buildup.
Step 7: Addressing Additional Issues
Loose Connections:
If there are any loose connections, tighten them using the appropriate tools.
Mineral Buildup:
Clean the showerhead to remove mineral deposits. Soak it in a mixture of vinegar and water overnight, then scrub away any remaining buildup.
Faulty Diverter Valve:
For complex issues like a faulty diverter valve, it’s best to seek professional help from a plumber.
Preventive Maintenance Tips:
To prevent future leaks and maintain your showerhead’s efficiency, consider the following tips:
- Regularly clean your showerhead to prevent mineral buildup.
- Check for leaks or loose connections periodically.
- Install a water softener if you have hard water.
- Address any plumbing issues promptly to avoid further damage.
Advanced Troubleshooting and Solutions:
For advanced troubleshooting of dripping shower heads, consider checking for damage to the showerhead or pipe, addressing stubborn mineral buildup with descaling solutions or a water softener, and upgrading to a more efficient showerhead if necessary. To prevent plumbing problems while on vacation in Edgewater, turn off the main water supply, check for leaks beforehand, have someone check your home periodically, and consider installing smart water leak detection devices for added security.
1. Addressing Persistent Leaks:
If the drip continues despite replacing the washer and ensuring a tight connection, there might be damage to the showerhead or the pipe itself. In such cases, consider the following:
Inspect the Showerhead:
Check for any cracks or signs of damage on the showerhead. If you notice any, it’s best to replace the showerhead altogether.
Examine the Pipe:
Inspect the pipe that connects to the showerhead for any corrosion or leaks. If you find any issues, it’s crucial to address them promptly to prevent further damage.
2. Dealing with Stubborn Mineral Buildup:
If mineral buildup is causing the drip and regular cleaning methods haven’t been effective, you can try more intensive approaches:
Use Descaling Solutions:
Commercial descaling solutions are available that can effectively dissolve stubborn mineral deposits. Follow the manufacturer’s instructions for safe and proper use.
Consider a Water Softener System:
Installing a water softener can prevent mineral buildup throughout your plumbing system, including the showerhead. This long-term solution can significantly reduce the occurrence of leaks and clogs.
3. Upgrading Your Showerhead:

Sometimes, upgrading to a newer, more efficient showerhead can solve persistent dripping issues. Look for showerheads with features like adjustable water pressure, anti-clog mechanisms, and water-saving options. Modern shower heads are designed to minimize leaks and provide a better showering experience.
4. Professional Plumbing Assistance:
Professional plumbing assistance is essential for complex issues like faulty diverter valves or persistent leaks. Experienced plumbers can diagnose and repair problems efficiently, ensuring your plumbing system functions optimally. Additionally, consider general contracting services for comprehensive home maintenance. General contractors can handle various tasks, from plumbing repairs to renovations, providing a holistic approach to maintaining and improving your home’s functionality and value.
FAQs
How do I stop my shower head from dripping?
To stop your shower head from dripping, start by turning off the water supply to your shower. Then, use an adjustable wrench to carefully unscrew the shower head from the pipe, inspect the rubber washer inside for wear or damage, and replace it if necessary. Finally, reattach the showerhead securely using pipe tape (Teflon tape) on the threads to create a watertight seal and turn the water supply back on to check for leaks.
Why does my electric shower head keep dripping?
Your electric shower head may be dripping due to a few common reasons. One possibility is that the rubber washer inside the shower head has worn out over time, causing water to leak. Another reason could be mineral buildup within the shower head, obstructing water flow and leading to leaks. Lastly, there might be a loose connection or a faulty component in the shower head that requires inspection and repair.
Can a leaking shower be repaired?
Yes, a leaking shower can typically be repaired. The repair process involves identifying the cause of the leak, which could be a worn-out washer, loose connections, or mineral buildup, and then taking appropriate steps to fix the issue. In some cases, you may need to replace certain components or seek professional plumbing assistance for more complex repairs.
Why is my shower head valve leaking?
Your shower head valve may be leaking due to several reasons. It could be a worn-out or damaged valve seal or gasket, causing water to seep through. Mineral buildup or debris within the valve can also lead to leaks by obstructing the valve’s proper functioning. Lastly, a loose or improperly installed valve could result in leaks and require tightening or reinstallation for a proper seal.
Why is my shower head dripping when turned off after?
Your shower head may drip when turned off due to a faulty or worn-out valve within the shower’s plumbing system. This could be caused by a damaged washer or seal that fails to create a complete seal, allowing water to continue dripping. Additionally, mineral buildup or debris in the valve can interfere with its closure, leading to persistent dripping after the shower is turned off.
Final Thoughts
Repairing a dripping shower head is a manageable task for many homeowners, but it’s essential to approach it systematically and be prepared for potential challenges. Regular maintenance, prompt repairs, and occasional upgrades can keep your plumbing fixtures in excellent condition and prevent water wastage.
Remember, each home’s plumbing system is unique, so if you’re unsure or encounter difficulties during the repair process, seek professional assistance. A.C.E. Plumbing and Home Services LLC is always ready to help Edgewater homeowners with their plumbing needs, ensuring a hassle-free and enjoyable shower experience.
We hope this extended guide has provided valuable insights and solutions for repairing dripping shower heads. May your showers be leak-free and refreshing for years to come!
